Cambugahay Falls Photography: A Masterclass in Waterfall Shots
Perfect your waterfall photography at Siquijor's most famous falls. Camera settings, composition tips, and techniques for capturing the iconic rope swing.
Cambugahay Falls Photography: A Complete Masterclass
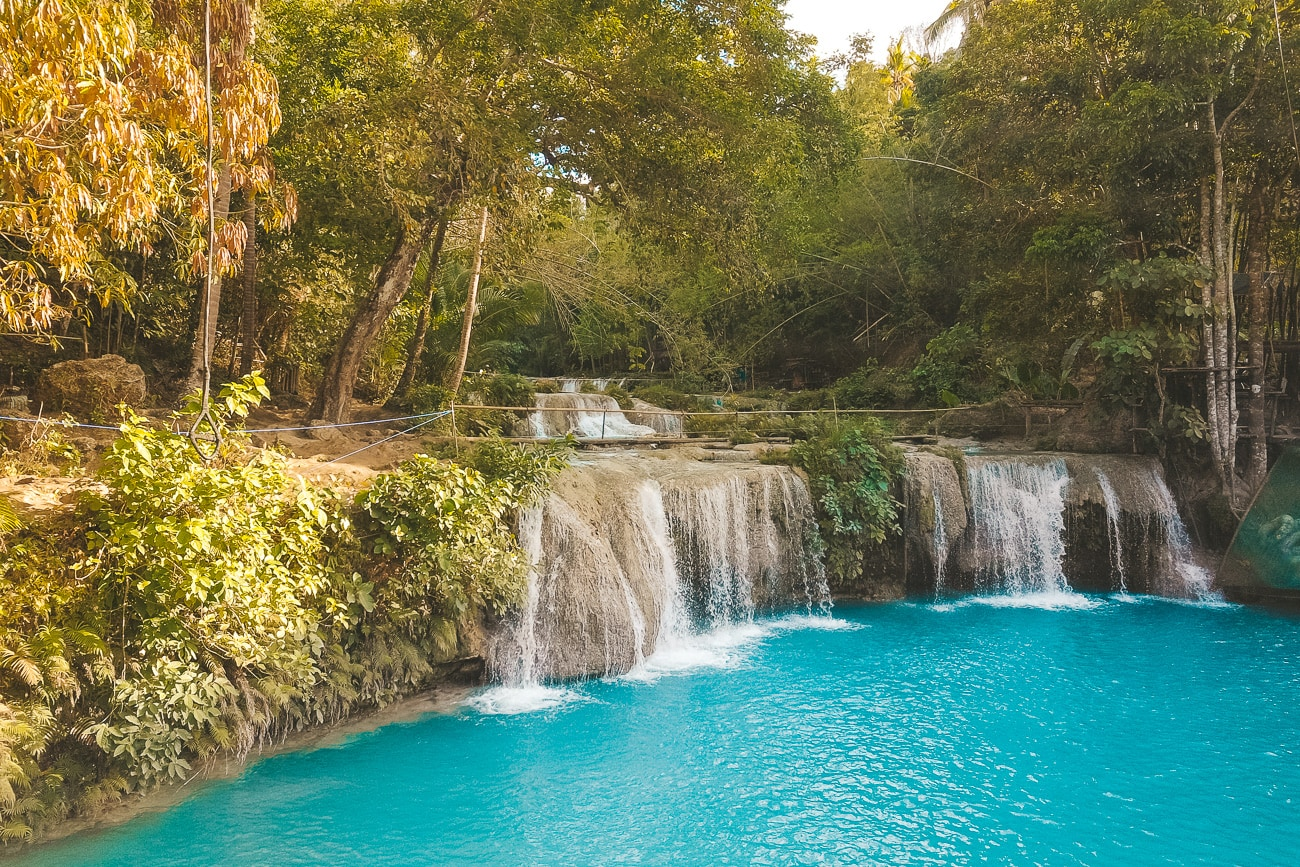
Cambugahay Falls isn’t just Siquijor’s most famous waterfall—it’s one of the most photogenic natural wonders in the Visayas. Three cascading tiers of turquoise water, framed by dense tropical foliage, with rope swings adding human drama to nature’s sculpture. For photographers, it’s a gift.
But like any well-known location, getting shots that rise above tourist snapshots requires technique, timing, and understanding what makes this waterfall unique. This guide covers everything from camera settings to composition strategies for creating waterfall images that stand out.
Understanding the Location
The Three Tiers
Cambugahay consists of three main pools connected by cascades:
First (Lowest) Tier: The most accessible and popular. This is where the main rope swing is located and where most visitors congregate.
Second Tier: Slightly less crowded, with its own smaller swing and a beautiful pool. Accessed by climbing past the first tier.
Third (Highest) Tier: The quietest, with the most dramatic waterfall. Fewer visitors make the climb.
For photography, each tier offers distinct opportunities:
- First tier: Action shots, swing photos, environmental portraits
- Second tier: Quieter compositions, more intimate scale
- Third tier: The most dramatic waterfall itself, nature focus
The Light Situation
The falls sit in a narrow valley surrounded by tall trees. This creates several lighting considerations:
Dappled Light: Midday sun creates harsh contrast between lit and shaded areas—challenging but not impossible.
Open Shade: The valley provides natural diffusion, especially on overcast days—ideal conditions.
Morning Light: Early morning light is soft and directional, but the valley blocks direct sunrise rays.
Mist Factor: Water spray creates mist that can catch light dramatically or cause lens flare problems.
Pro Tip
Overcast days are your friend here. Clouds act as giant softboxes, eliminating harsh shadows and allowing the true turquoise color of the water to shine.
Essential Gear
Camera Considerations
Any camera with manual controls works, but some features help:
- Weather sealing (mist is constant)
- High resolution (for cropping options)
- Good dynamic range (for handling contrast)
- Articulating screen (for low angle shots without lying in water)
Lens Selection
Wide Angle (16-35mm equivalent):
- Captures entire falls and context
- Creates sense of immersion
- Emphasizes foreground elements
- Best for environmental shots
Standard Zoom (24-70mm equivalent):
- Versatile for multiple compositions
- Good for swing action shots
- Allows tighter framing without lens changes
- The practical choice if bringing one lens
Telephoto (70-200mm):
- Compresses perspective
- Isolates details
- Captures swing action from safe distance
- Less essential but useful for variety
Filters
ND Filter (3-10 stops): Essential for long exposures in daylight. Without it, you can’t achieve silky water effects except in very low light.
Polarizing Filter: Reduces glare on water, cuts through reflections, enhances the turquoise color. Highly recommended.
Can You Stack Both? Yes, though vignetting may occur on wide angles. Test before committing to a shot.
Tripod
Non-negotiable for waterfall photography. Look for:
- Legs that can spread wide (for uneven ground)
- Low minimum height (for low perspectives)
- Stability (water adds motion blur at any shake)
- Waterproof materials (you’ll get wet)
Protection
- Waterproof camera bag or rain cover
- Multiple lens cloths (they’ll get wet)
- Silica gel packets (for humidity)
- Protective filter on lens
Important
Mist is relentless. Check your front element before every shot. A single water droplet can ruin a 30-second exposure.
Camera Settings Guide
The Silky Water Look
Long exposures smooth moving water into dreamy silk:
Settings:
- ISO: 100 (lowest native)
- Aperture: f/8-f/11 (sharpest zone for most lenses)
- Shutter: 1-10 seconds (depending on water speed and desired effect)
- ND Filter: Required in daylight
- Focus: Manual, on primary subject
- White Balance: Shade or Cloudy (warms the scene)
The Formula:
- Set ISO 100 and f/8
- Meter the scene normally
- Add ND filter stops to exposure calculation
- Adjust shutter speed until exposure balances
Example: Without filter: 1/125s at f/8, ISO 100 With 6-stop ND: 0.5s at f/8, ISO 100 With 10-stop ND: 8s at f/8, ISO 100
Freezing Motion
For capturing sharp swing action and water droplets:
Settings:
- ISO: 400-800 (higher in shade)
- Aperture: f/4-f/5.6 (for faster shutter)
- Shutter: 1/500s minimum (1/1000s+ for sharp droplets)
- Focus: Continuous AF or pre-focused manually
- Drive Mode: Continuous high-speed
Tips:
- Track the swinger through the arc
- Anticipate the peak moment (arms spread, height of swing)
- Take many frames—delete later
Balanced Approach
For natural-looking water with some blur but frozen spray:
Settings:
- ISO: 100-200
- Aperture: f/5.6-f/8
- Shutter: 1/15s-1/60s
- Tripod: Recommended but handheld possible
This creates water that shows movement without the over-processed silky look.
Composition Strategies
First Tier Compositions
The Iconic Swing Shot:
- Position at water level or slightly above
- Swinger at peak height
- Falls as backdrop
- Include water reflection if calm
Environmental Portrait:
- Subject standing in water, looking at falls
- Wide angle to include full setting
- Subject smaller in frame emphasizes nature’s scale
Detail Shots:
- Rope swing when empty (waiting, anticipating)
- Water patterns in pool
- Roots and rocks as texture studies
Second Tier Compositions
Intimate Cascade:
- Move closer to the cascade between first and second tier
- Focus on water patterns and form
- Less about the grand view, more about water dynamics
The Empty Pool:
- If you arrive early, the second tier is often empty
- Mirror-like reflections possible
- More private, personal compositions
Third Tier Compositions
The Dramatic Falls:
- Highest drop, most visual impact
- Shoot from below looking up
- Long exposure transforms cascade into curtain
Rainforest Context:
- Pull back to include surrounding jungle
- Falls as element within larger ecosystem
- Works best in vertical orientation
Universal Composition Elements
Leading Lines:
- Fallen logs guide eye to falls
- Water flow creates natural direction
- Rocks can form foreground pathways
Foreground Interest:
- Mossy rocks
- Leaves floating in pools
- Roots reaching into water
Natural Framing:
- Overhanging branches
- Rock formations
- Light breaking through canopy
Pro Tip
The strongest compositions often come from the least comfortable positions. If you’re comfortably standing, you’re shooting like everyone else. Get low, step into the water, or climb higher.
Timing and Crowds
The Crowd Problem
Cambugahay is popular. By mid-morning, expect 50+ visitors across all tiers. This creates challenges:
- People in every shot
- Long waits for swing turns
- Noise affecting concentration
- Less room to maneuver
Solutions
Arrive at Opening (6-7 AM):
- First 30-60 minutes are magical
- Often have the falls to yourself
- Soft morning light
- Worth the early wake-up
Weekday Advantage:
- Monday-Thursday noticeably quieter
- Skip weekend mornings entirely if possible
Work with People:
- Use long exposures where moving people blur or disappear
- Include people intentionally as subjects
- Focus on details that don’t include crowds
Explore All Tiers:
- First tier has most people
- Second and third are progressively quieter
- The hike up filters out casual visitors
Post-Processing Tips
Color Enhancement
The turquoise water color is real but may need encouragement:
- Increase vibrance slightly
- HSL adjustment to boost aqua/cyan
- Don’t oversaturate—the color should look natural
- White balance can shift toward cooler if too warm
Exposure Blending
High contrast scenes may need:
- HDR processing of brackets
- Luminosity masking for selective adjustment
- Shadow recovery without losing highlights
Sharpening Strategy
- Sharpen water edges, not the silky center
- Use masking to avoid noise amplification
- Long exposure noise reduction in camera or post
The Export
For social media:
- Slightly more contrast than print
- Consider the thumbnail appearance
- Add sharpening for screen display
Beyond Technical: The Artistic Approach
Tell a Story
What draws you to this place? What feeling do you want to convey?
- Wonder at nature’s creation
- Joy of the swing experience
- Tranquility of the pool
- Adventure in the climb
Let this guide your composition choices.
Embrace Imperfection
Not every shot needs to be perfect:
- Motion blur can convey energy
- Mist can add atmosphere
- People add life and scale
- Weather creates mood
Create a Series
Rather than hunting one “hero shot,” build a set:
- Wide establishing shot
- Medium environmental shot
- Close detail shots
- Action/human element
- Mood/atmosphere shot
Together, these tell the complete story of Cambugahay.
Practical Visit Tips
Getting There
From San Juan: 20-25 minute motorbike ride. Follow signs to Lazi, then signs to Cambugahay.
Parking: ₱20-30, informal lot near entrance.
The Walk: 100+ steps down to the falls. The return climb is warming.
What to Bring
- Camera gear in waterproof bag
- Change of clothes
- Towel
- Water and snacks
- Cash for entrance and parking
- Dry bag for phone/valuables
Entrance Fee
₱100 entrance fee, plus ₱50 for unlimited rope swing access (worth it for action shots). Parking is ₱20-30. Life vests available for swimmers who need them.
Etiquette
- Don’t block paths for extended shoots
- Share swing time fairly
- Pack out all trash
- Respect local guides offering services
- No loud equipment (generators, etc.)
Sample Photography Schedule
5:30 AM: Leave accommodation 6:00 AM: Arrive, descend to falls 6:15 AM: Set up at first tier, shoot empty falls 6:30 AM: First visitors arrive—capture with people 7:15 AM: Climb to third tier for dramatic falls 8:00 AM: Return to second tier for intimate shots 8:30 AM: Detail shots and final compositions 9:00 AM: Crowds significant—consider departing 9:30 AM: Exit, review images over breakfast
The Payoff
Cambugahay Falls offers something increasingly rare: a genuinely photogenic natural location that hasn’t been completely overrun. With planning, technique, and patience, you can create images that capture why this waterfall stops travelers in their tracks.
The turquoise water, the dramatic rope swing, the jungle frame—it’s all waiting for your lens. The only question is whether you’ll be there when the light and moment align.
Set your alarm. Make the descent. Embrace the mist.
Find more Siquijor photography inspiration with our guide to Instagram-worthy spots or plan your adventure day around cliff jumping at Salagdoong.
Frequently Asked Questions
What camera settings work best for Cambugahay Falls?
When is the best time to photograph Cambugahay Falls?
Do I need special equipment for waterfall photography?
How do I protect my camera from water at the falls?
Can I photograph the rope swing in action?
Island Adventures Team
Waterfall photography specialists capturing Siquijor's cascading beauty.
Related Experiences
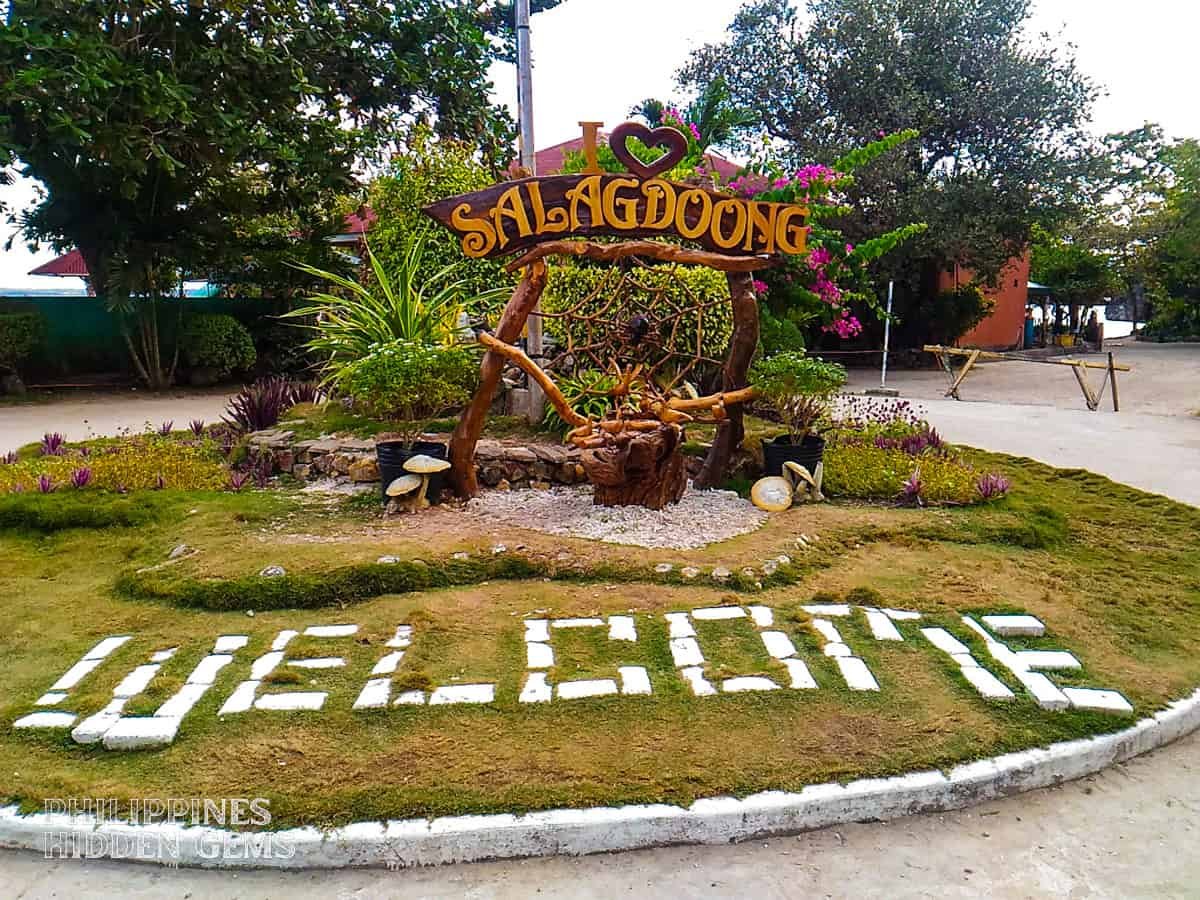
Cliff Jumping at Salagdoong Beach
Your complete guide to cliff jumping at Salagdoong Beach - Siquijor's most thrilling adventure with platforms at 5m, 8m, and 10m heights.
15 Most Instagrammable Spots in Siquijor (With GPS Coordinates)
Find the most photogenic locations in Siquijor for stunning social media content. Exact locations, best times to shoot, and tips for each iconic spot.
10 Stunning Sunrise Photography Spots in Siquijor
Capture magical golden hour moments at these handpicked sunrise locations across Siquijor Island. GPS coordinates, timing tips, and camera settings for each spot.