10 Stunning Sunrise Photography Spots in Siquijor
Capture magical golden hour moments at these handpicked sunrise locations across Siquijor Island. GPS coordinates, timing tips, and camera settings for each spot.
10 Stunning Sunrise Photography Spots in Siquijor
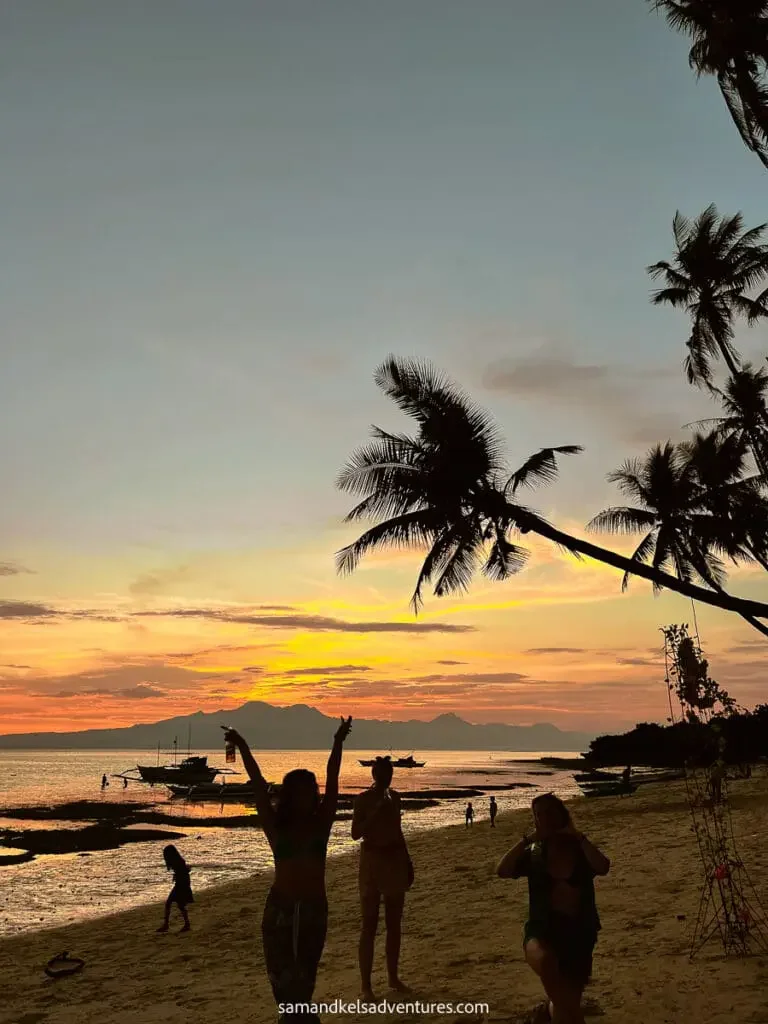
There’s a reason photographers obsess over golden hour—those fleeting minutes when the sun paints the world in amber, rose, and gold. In Siquijor, this magic happens twice daily, but sunrise holds something special: empty beaches, glassy seas, and the solitude to compose the perfect shot.
This island’s compact size means you can reach any sunrise spot within 30 minutes from most accommodations. We’ve scouted every accessible viewpoint to bring you the definitive guide to Siquijor sunrise photography.
Before You Go: Preparation Tips
Timing
Siquijor sits at approximately 9° north latitude, meaning sunrise times don’t vary as dramatically as in temperate regions:
- June (earliest): Around 5:30 AM
- December (latest): Around 6:15 AM
- March/September (equinox): Around 5:50 AM
Arrive 30-45 minutes before sunrise. The pre-dawn blue hour offers its own photo opportunities, and you’ll want time to set up and adjust your composition.
Weather
Check forecasts, but don’t be discouraged by clouds—they’re often the difference between a boring clear-sky sunrise and dramatic, colorful explosions. Overcast skies that clear near the horizon can produce the most spectacular results.
Gear Checklist
- Camera with manual controls (or phone with pro mode)
- Wide-angle lens (16-35mm equivalent)
- Telephoto lens for compressed perspectives (optional)
- Sturdy tripod (essential for low-light and long exposures)
- Remote shutter release or timer function
- Extra batteries (charge the night before)
- Lens cloth (morning humidity is real)
- Headlamp or flashlight for setup
- Light jacket (mornings can be cool)
- Coffee (essential gear)
The Spots
1. Sandugan Beach Jetty
Sandugan Beach Jetty
A small fishing pier extending into the sea, creating a perfect leading line toward the rising sun. Local boats often add foreground interest.
Why It Works: The jetty provides classic leading lines pointing directly at the sunrise. Fishing boats often anchor nearby, adding local character to your composition.
Best Conditions: Calm seas, scattered clouds Difficulty: Easy access, short walk from road Entrance Fee: Free
Camera Settings Starting Point:
- Wide angle (16-24mm) for jetty and sky
- f/8-f/11 for sharpness throughout
- ISO 100, adjust shutter for exposure
- Bracket ±2 stops for HDR
Pro Tip
Arrive extra early to catch fishermen preparing boats. Their silhouettes against the pre-dawn sky create powerful human-interest shots.
2. Kagusuan Beach
Kagusuan Beach
A quiet beach on the southeast coast with a gentle curve and scattered boulders that photograph beautifully as the sun clears the horizon.
Why It Works: The boulders scattered along this beach provide natural foreground interest. Their wet surfaces reflect sunrise colors beautifully.
Best Conditions: Low tide (exposes more rocks), any cloud cover Difficulty: Moderate (some walking on uneven sand) Entrance Fee: Free
Composition Tips:
- Position rocks in lower third
- Look for tide pools reflecting sky
- Include the curve of the beach as leading element
- Try both horizontal and vertical framing
3. Enrique Villanueva Coastline
Enrique Villanueva Viewpoint
An elevated stretch of road on the southeast corner offers dramatic cliff-edge views over rocky coastline and open sea.
Why It Works: This elevated perspective gives you both foreground (cliffs, vegetation) and middle-ground (sea, rocks) before the sunrise backdrop.
Best Conditions: Clear or partly cloudy, calm to moderate seas Difficulty: Easy (shoot from roadside) Entrance Fee: Free
Unique Angle: This is one of few spots where you can include both dramatic coastline and the eastern horizon. Perfect for wide panoramas.
4. Maria Church Grounds
Maria Parish Church
The historic church faces east, and its grounds offer views toward the sea with interesting colonial architecture as framing elements.
Why It Works: Combining architecture with landscape creates a unique Siquijor sunrise image. The church’s eastern orientation wasn’t accidental—colonials knew their sunrise too.
Best Conditions: Clear sky for clean lines, or dramatic clouds Difficulty: Easy Entrance Fee: Free (be respectful of early mass schedules)
Composition Ideas:
- Frame sunrise through church archways
- Silhouette the bell tower against colorful sky
- Include the church grounds’ gardens as foreground
5. Larena Port
Larena Port
The main ferry port offers industrial foreground elements—boats, cranes, dock structures—that contrast with natural beauty.
Why It Works: Not every sunrise needs to be pristine nature. The working port adds a documentary quality, and early ferries can create interesting silhouettes.
Best Conditions: When a ferry is docked or arriving Difficulty: Easy Entrance Fee: Free (public port area)
Timing Note: Check ferry schedules. The OceanJet from Dumaguete arrives early morning—capturing a ship silhouetted against sunrise is dramatic.
Important
Stay aware of port operations and stay clear of loading/unloading areas. The port is active early morning.
6. Lazi Coastline
Lazi Coastal Road
The stretch between Lazi town and Maria offers multiple pullover spots with coconut palm foregrounds and eastern sea views.
Why It Works: Classic tropical sunrise imagery—palm tree silhouettes against fiery skies. The coastal road has numerous spots to pull over.
Best Conditions: Scattered clouds for color, light breeze for palm movement Difficulty: Easy Entrance Fee: Free (roadside shooting)
The Classic Shot: Position a coconut palm off-center, expose for the sky, and let the palm go fully silhouette. It’s a cliché because it works.
7. Salagdoong Beach (East Entrance)
Salagdoong Beach Lookout
Before the cliff jumping chaos begins, the eastern cliffs offer stunning sunrise views over the cove.
Why It Works: The famous cliff diving spot transforms at sunrise. You’ll likely have it entirely to yourself, and the cove creates interesting light play.
Best Conditions: Calm water (reflects colors) Difficulty: Easy to moderate (some steps) Entrance Fee: ₱50 (may be unmanned very early)
Bonus: Shoot your sunrise shots, then stay for an early morning swim in empty waters.
8. Tongo Point
Tongo Point
A small headland on the eastern coast where waves crash against rocky outcrops, creating drama in the foreground.
Why It Works: Adding motion (waves) to your sunrise creates dynamic images. Long exposures smooth the water while the sky sharpens.
Best Conditions: Moderate wave action, any sky Difficulty: Moderate (rocky terrain in low light) Entrance Fee: Free
Technical Approach:
- Use ND filter for long exposures (1-10 seconds)
- f/11-f/16 for depth of field
- Time exposures to capture wave motion
- Protect gear from spray
9. Mt. Bandilaan Slopes
Mt. Bandilaan Eastern Slope
For early risers willing to climb, the mountain's slopes offer sunrise views above the coastal haze.
Why It Works: Elevation changes everything. Even partway up Bandilaan, you’re above the coastal atmosphere, and the views extend to distant islands.
Best Conditions: Clear, or when coastal fog sits below you Difficulty: Challenging (pre-dawn drive on mountain roads) Entrance Fee: Free (park area)
The Commitment: This requires a 4 AM departure to reach the slopes before sunrise. The reward is a perspective almost no one photographs.
Important
Mountain roads are tricky in darkness. Use caution, go slowly, and make sure your motorcycle lights are strong. Consider driving up the evening before and camping (arrange with locals).
10. Tubod Marine Sanctuary Beach
Tubod Beach
The marine sanctuary's beach faces northeast, catching early light while the protected waters stay mirror-calm.
Why It Works: The protected sanctuary waters are often glassy in early morning, creating perfect reflection conditions.
Best Conditions: No wind, scattered clouds Difficulty: Easy Entrance Fee: ₱50 (sanctuary fee)
Reflection Technique:
- Get low (camera near water level)
- Wait for absolute stillness
- Include both subject and reflection in frame
- Consider vertical orientation
Camera Settings Guide
Exposure Basics for Sunrise
Before the Sun Appears (Blue Hour):
- ISO 400-800
- f/4-f/8
- 1-10 seconds (tripod required)
- White balance: Shade or Cloudy for warm tones
As Sun Clears Horizon (Golden Hour):
- ISO 100-200
- f/8-f/11
- 1/30-1/250s depending on brightness
- White balance: Daylight
Sun Above Horizon (Bright Conditions):
- ISO 100
- f/11-f/16
- 1/250-1/500s
- ND filters may help balance sky and land
Bracketing for HDR
Sunrise contrast often exceeds your camera’s dynamic range. Bracket exposures:
- Expose for highlights (dark foreground, detailed sky)
- Normal exposure
- Expose for shadows (bright foreground, blown sky)
Blend in post-processing for full dynamic range.
Focus Strategy
- Manual focus at hyperfocal distance for maximum sharpness
- For foreground interest + infinity, focus 1/3 into the scene
- Use Live View magnification to check focus before shooting
Post-Processing Tips
Enhance Without Overdoing
The temptation with sunrise shots is to push saturation until they look radioactive. Resist.
Subtle Adjustments:
- Lift shadows slightly
- Lower highlights to recover sky detail
- Small clarity boost (10-20)
- Vibrance over saturation
- Graduated filter to balance exposure
White Balance
Experiment with white balance in post:
- Cooler tones enhance blue hour
- Warmer tones emphasize golden hour
- Split-toning (warm highlights, cool shadows) adds depth
Making the Most of Your Morning
The Night Before
- Check sunset direction apps (PhotoPills, The Photographer’s Ephemeris)
- Charge all batteries
- Prepare coffee/snacks
- Set multiple alarms
- Lay out clothes and gear
The Morning Routine
- Wake 1.5 hours before sunrise
- Quick breakfast, warm drink
- Arrive at location 45 minutes early
- Scout in the twilight for compositions
- Set up and wait for the magic
After the Shoot
Don’t pack up immediately when the sun clears the horizon. The 30 minutes following sunrise often bring beautiful, soft light as the sun climbs into thin clouds.
Then reward yourself with a proper breakfast—you’ve earned it.
Final Thoughts
Siquijor’s size means you can visit multiple sunrise spots during a week’s stay, never shooting the same location twice. Each spot offers different character, from tropical cliché (palm silhouettes) to unique perspective (mountain slopes).
The best sunrise photo, though, isn’t about the location. It’s about being present when light transforms ordinary scenes into extraordinary moments. Set your alarm, grab your camera, and let Siquijor’s dawns work their magic.
Looking for sunset shots instead? Check our sunset photography locations guide or explore all our top Instagram spots in Siquijor.
Frequently Asked Questions
What time is sunrise in Siquijor?
Which coast is best for sunrise photography?
Do I need permission to photograph at these locations?
What camera settings work best for sunrise?
Can I photograph sunrise with a phone?
Island Adventures Team
Photography enthusiasts capturing Siquijor's most magical moments.
Related Experiences

Siquijor Motorcycle Routes: The Complete 72km Island Loop Guide
Explore Siquijor's scenic coastal and mountain roads by motorcycle. Detailed route guide covering all six municipalities, hidden stops, and essential rider tips.
15 Most Instagrammable Spots in Siquijor (With GPS Coordinates)
Find the most photogenic locations in Siquijor for stunning social media content. Exact locations, best times to shoot, and tips for each iconic spot.

12 Best Sunset Photography Spots in Siquijor: A Photographer's Guide
Chase the golden hour at Siquijor's most spectacular sunset viewpoints. Complete guide with GPS locations, best dates for alignment, and pro photography tips.